Print your own
solar filter.
A two-part, glue-free push-on solar-film mount you 3D-print at home, sized to your exact lens. Measure your lens front, pick your size, download, print it, and clamp in certified solar film.
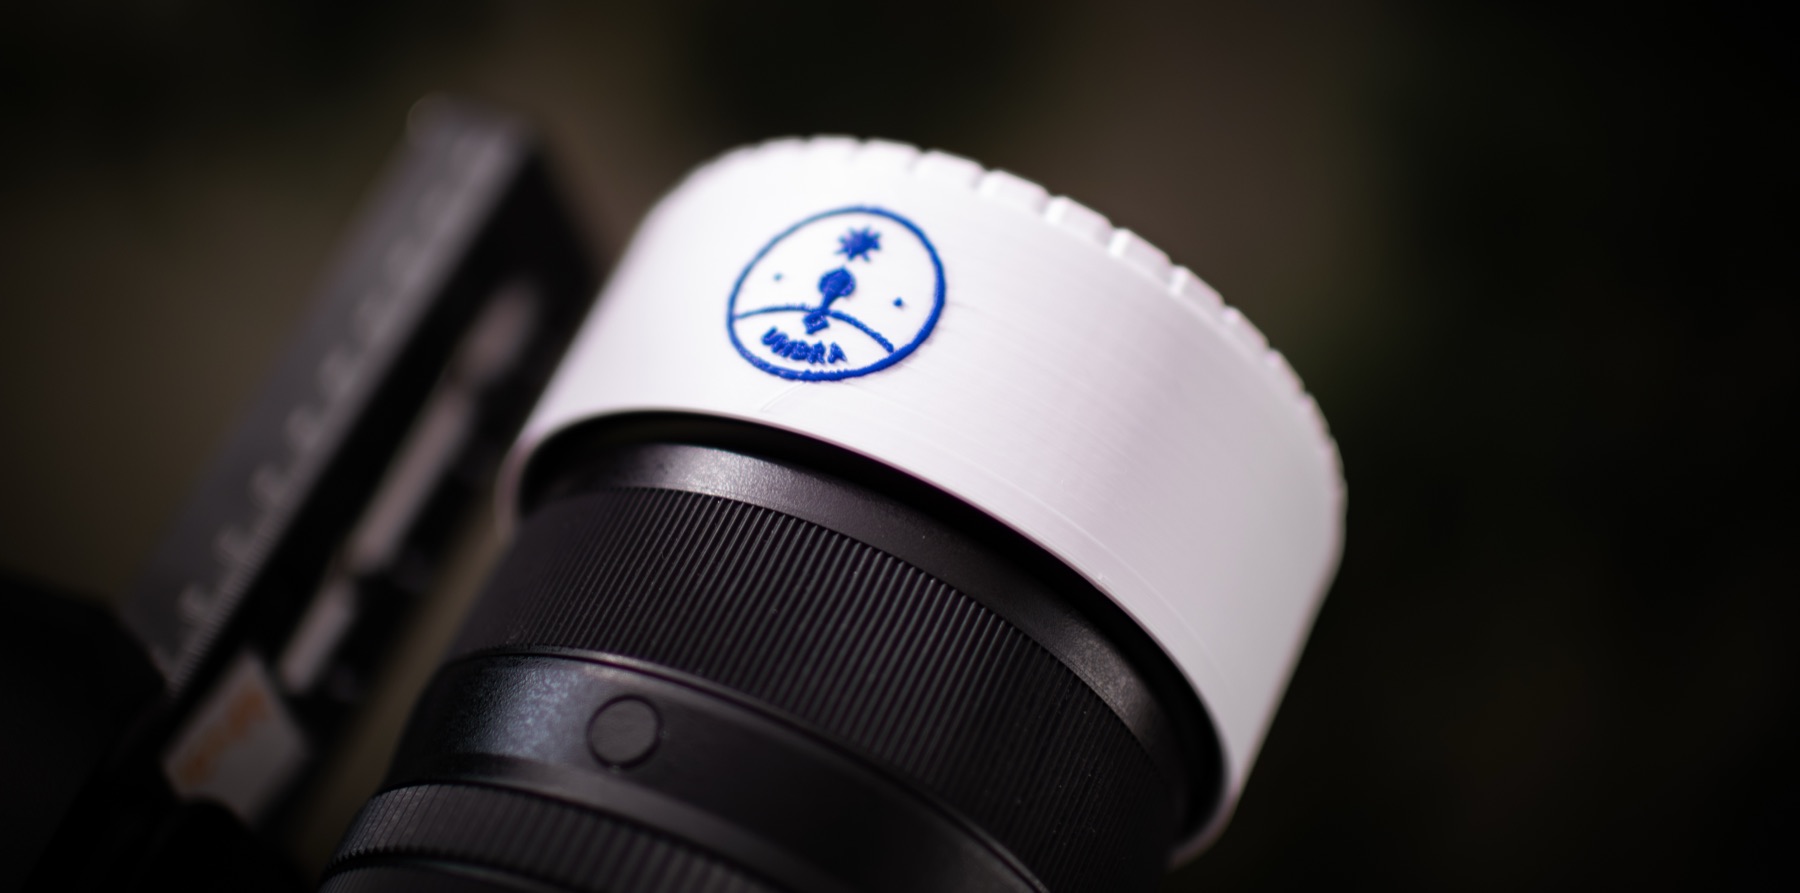
Printed at home, clamped with certified solar film, pushed onto the lens.
Looking at the sun through an unfiltered lens, or through the wrong film, will permanently damage your eyes and your camera in an instant. This mount is only a holder. It makes no optical or safety claim on its own.
Use only certified solar film made for direct solar viewing (Thousand Oaks Optical or Baader AstroSolar). Inspect the film for pinholes and scratches against a bright light before every use. Make sure the printed mount seats fully and the film is clamped flat with no gaps before you point anything at the sun.
The Umbra Eclipse App and Steven Madow Aerial Productions LLC make no warranties or guarantees of any kind about this design, these files, or any filter you build from them, and accept no liability for any injury, eye damage, equipment damage, or other loss arising from their use. You download, print, assemble, and use these files entirely at your own risk. Solar-viewing safety is your sole responsibility.
It's two printed parts and a disc of solar film:
- Body: a skirt that pushes over the front of your lens (lined with a little soft velcro so it grips without marking the barrel), leading into a deep well.
- Ring: pushes down into the well and clamps the solar film flat against an inner shoulder. No glue, no tape.
- Stencil: a print-at-100% paper template so you cut the film to the exact right disc.
It's set up as a multi-color print. The included Bambu 3MF opens with the whole filter on one plate, colors already assigned: a light shell and flange, a black light-blocking liner and core, and the badge in an accent color. Just load your filaments and print. Single extruder? Use the plain STLs in any dark, opaque color, a light or translucent filament lets sunlight leak through the walls, so black PETG is the pick.
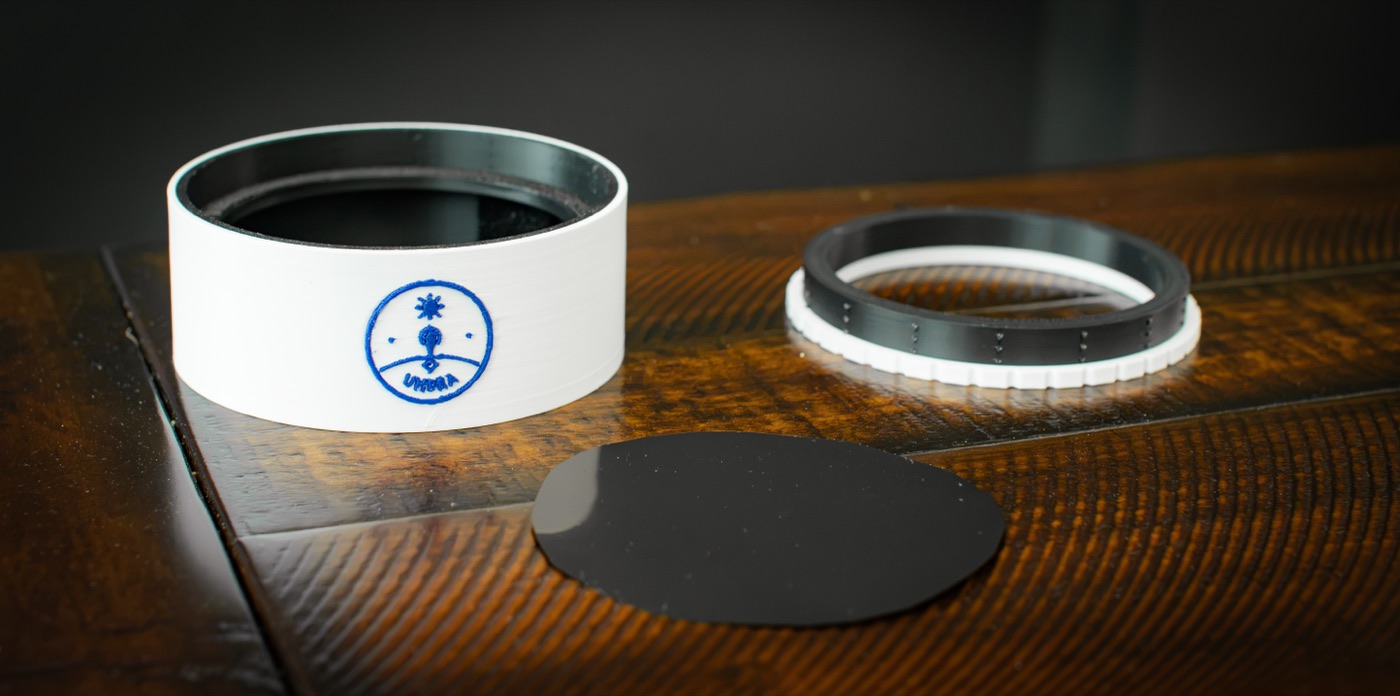
Body, ring, film disc. That's the whole thing.
Besides a 3D printer and filament, you supply two things: certified solar film and a little velcro. Here's what I use.
Certified solar film
Thousand Oaks Optical black-polymer film, this is the actual filter, the printed parts just hold it. Get the 8×8" sheet: it's four times the area of the 4×4" for less than half the price, so you have spare film if you slip while cutting.
Plush velcro squares
Line the inside of the skirt with the soft (plush) side facing the lens. Add them one at a time until the mount grips snugly, that way you can peel one back to fine-tune the fit without disturbing your focus or zoom.
Those are affiliate links, so they support my work at no extra cost to you.
Measure
Measure the outer diameter of your lens's front barrel in millimeters (see below).
Pick & download
Find your size in the finder and download the zip: body, ring, and stencil.
Print body and ring in the filament you have (PETG, PLA, ABS, or ASA). Turn on supports and a small brim.
Cut film
Print the stencil at 100%, lay your certified solar film over it, cut the solid circle.
Assemble
Drop the film disc in the well, push the ring in to clamp it, push the mount onto your lens.
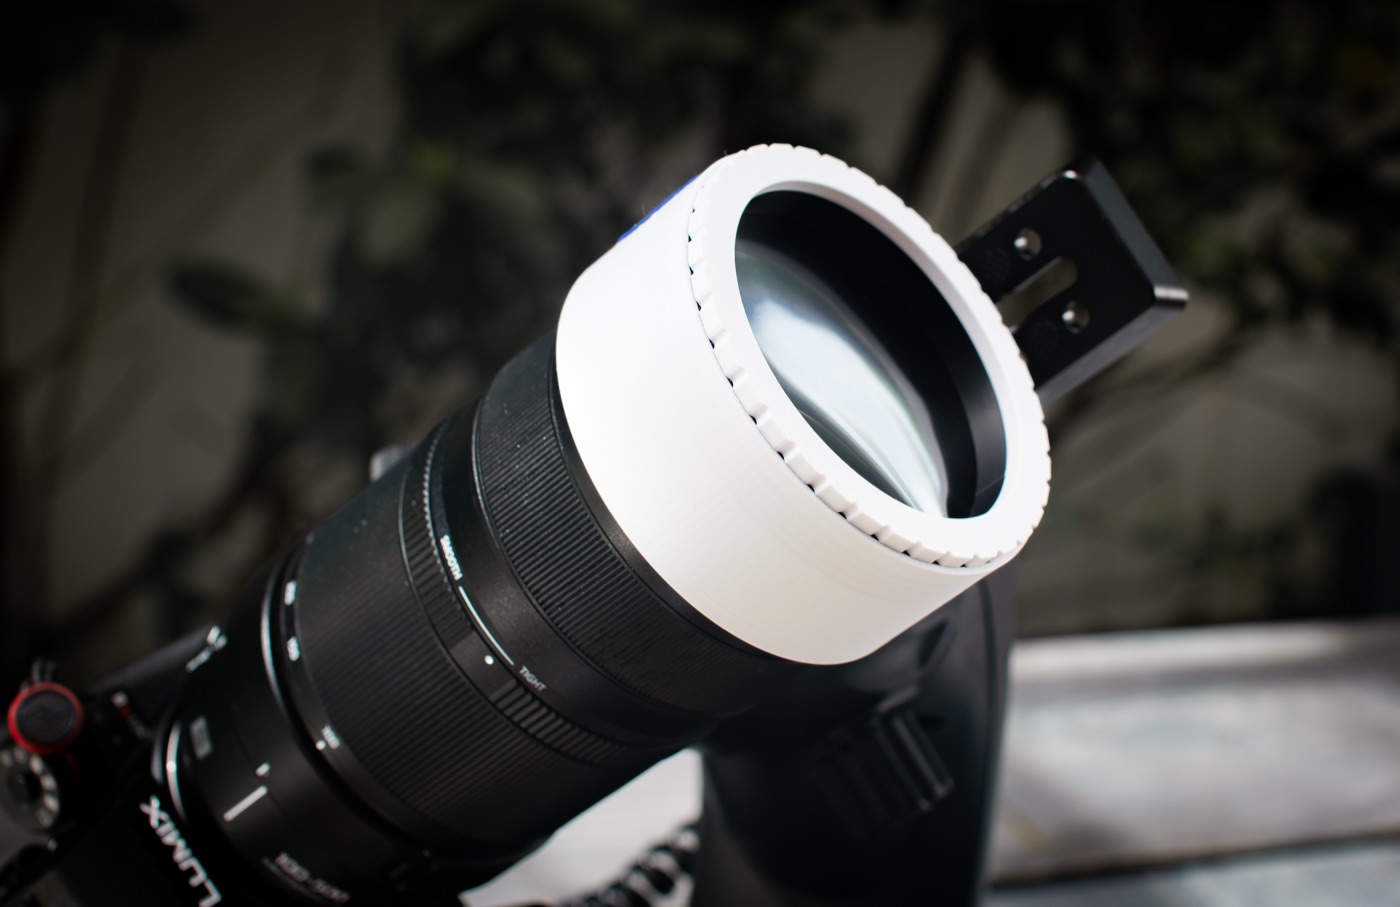
Pushed on over the barrel. No threads, no adapters.
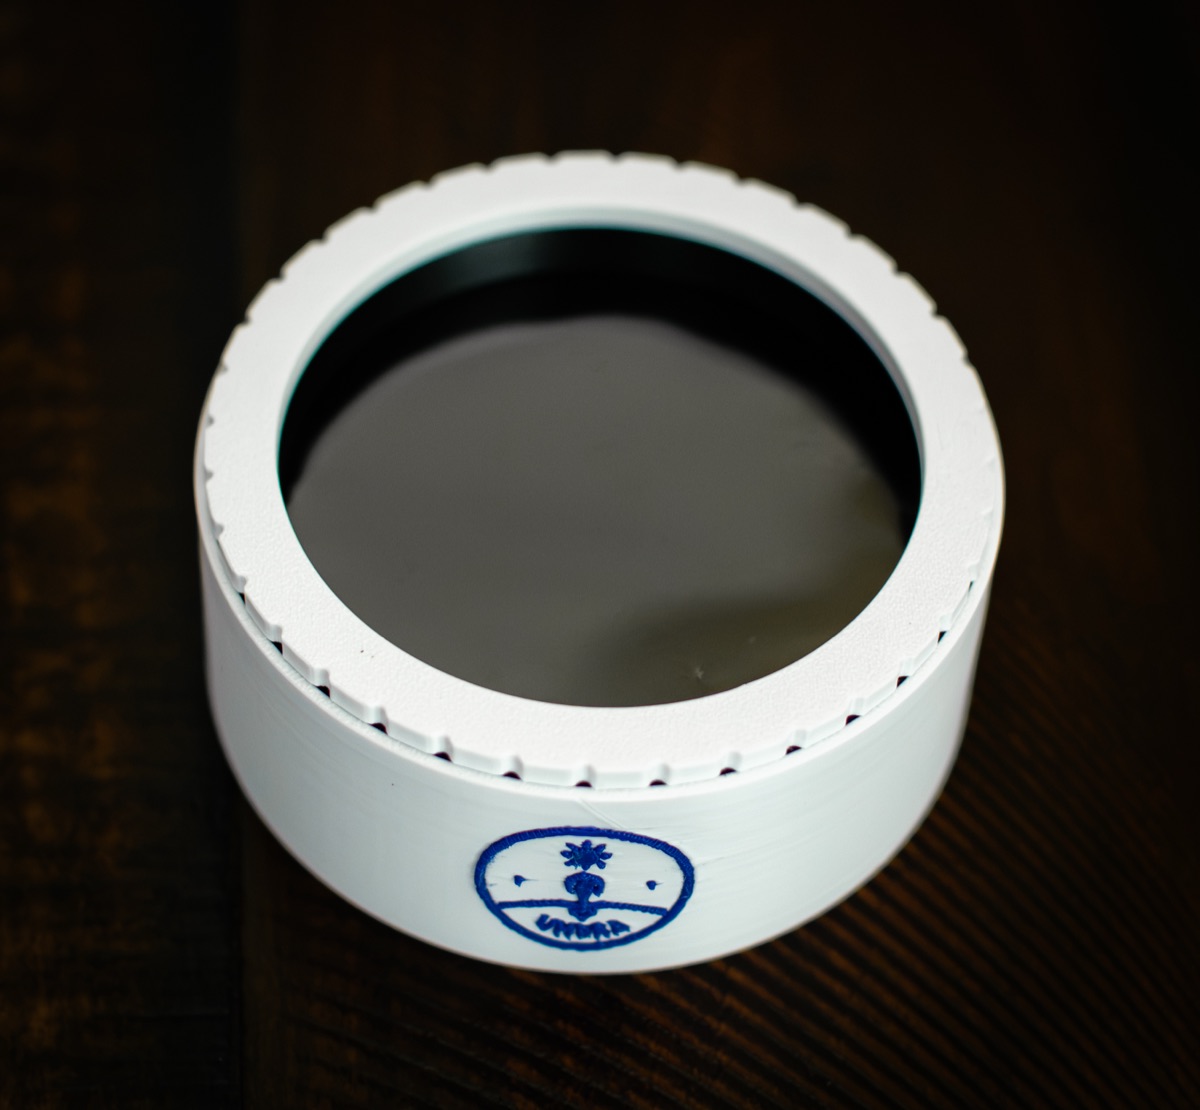
The ring clamps the film flat. No glue, no tape.
You want the front outer diameter: the widest outside edge of the lens's front barrel, not the filter thread size. You do not need to be precise about this.
- A ruler across the front of the barrel, in millimeters, is plenty. Calipers are nice if you have them, but they are not necessary.
- Another easy way: wrap a strip of paper around the front, mark where it overlaps, measure that length with a ruler, and divide by 3.14.
- The filter-thread number printed on your lens (the
øfigure, e.g.ø77) is smaller than the outer diameter. Don't use it directly, but it's a decent sanity check (outer diameter is usually a few mm larger).
The soft velcro liner takes up a couple of millimeters and gives each size a small grip range, so close is good enough. The finder handles the rounding, and you add velcro one square at a time until it grips.
The size is the largest lens front it fits. So pick the smallest size that's at or above your measured front diameter. Each one covers a small band down from there (the velcro liner takes up the slack). Clear opening is the unobstructed view through the finished filter. Your first download opens a quick form (name and email).
| Size | Fits lens front | Film disc | Clear opening | Mount outer |
|---|
Bigger than 227 mm is telescope territory and out of scope here. If your lens lands between two sizes, the finder rounds up to the smallest one that still fits over it (a hair loose, snug it with a velcro layer).
Print settings
- Material: any filament works: PETG, PLA, ABS, or ASA. The file locks nothing in, you pick the material in your slicer. PETG, ABS, or ASA hold up best if the mount will sit in direct sun for a while; PLA is fine for quick use but can soften in prolonged heat.
- Color: print the body in a dark, opaque color so no sunlight passes through the walls; black also cuts internal flare. Black PETG is a great pick.
- Supports: turn them on. Without supports the overhangs sag (it strings and spaghettis).
- Brim: about 5 mm helps the skirt stick.
- Orientation: already baked in, print both parts as the files sit. The body is oriented well-down so supports come off the inside cleanly; the ring sits flange-down.
- Fit: the ring pushes into the well with a snug fit. Print the body first and test-push it on your lens before committing to the ring.
- Slicer says "filament type doesn't match"? That's your slicer's AMS/spool setting, not the file. Set the plate's filament to whatever you actually have loaded and it will slice fine.
Every download contains
umbra-filter-<size>.3mf: the whole filter, body and ring, on one plate with the colors pre-assigned. Open in Bambu Studio or Orca, load filaments, slice, print.body.stl/ring.stl: single-color versions for any slicer or one filament.stencil.pdf: print-at-100% film cutting template with a built-in ruler to verify the scale.info.jsonandREADME.txt: the exact dimensions and a short print guide.
Use only certified solar film (Thousand Oaks / Baader AstroSolar). Inspect for pinholes before every use. Confirm the mount is fully seated and the film is clamped flat with no light leaks. This mount and stencil are not a safety certification. When in doubt, don't look.